
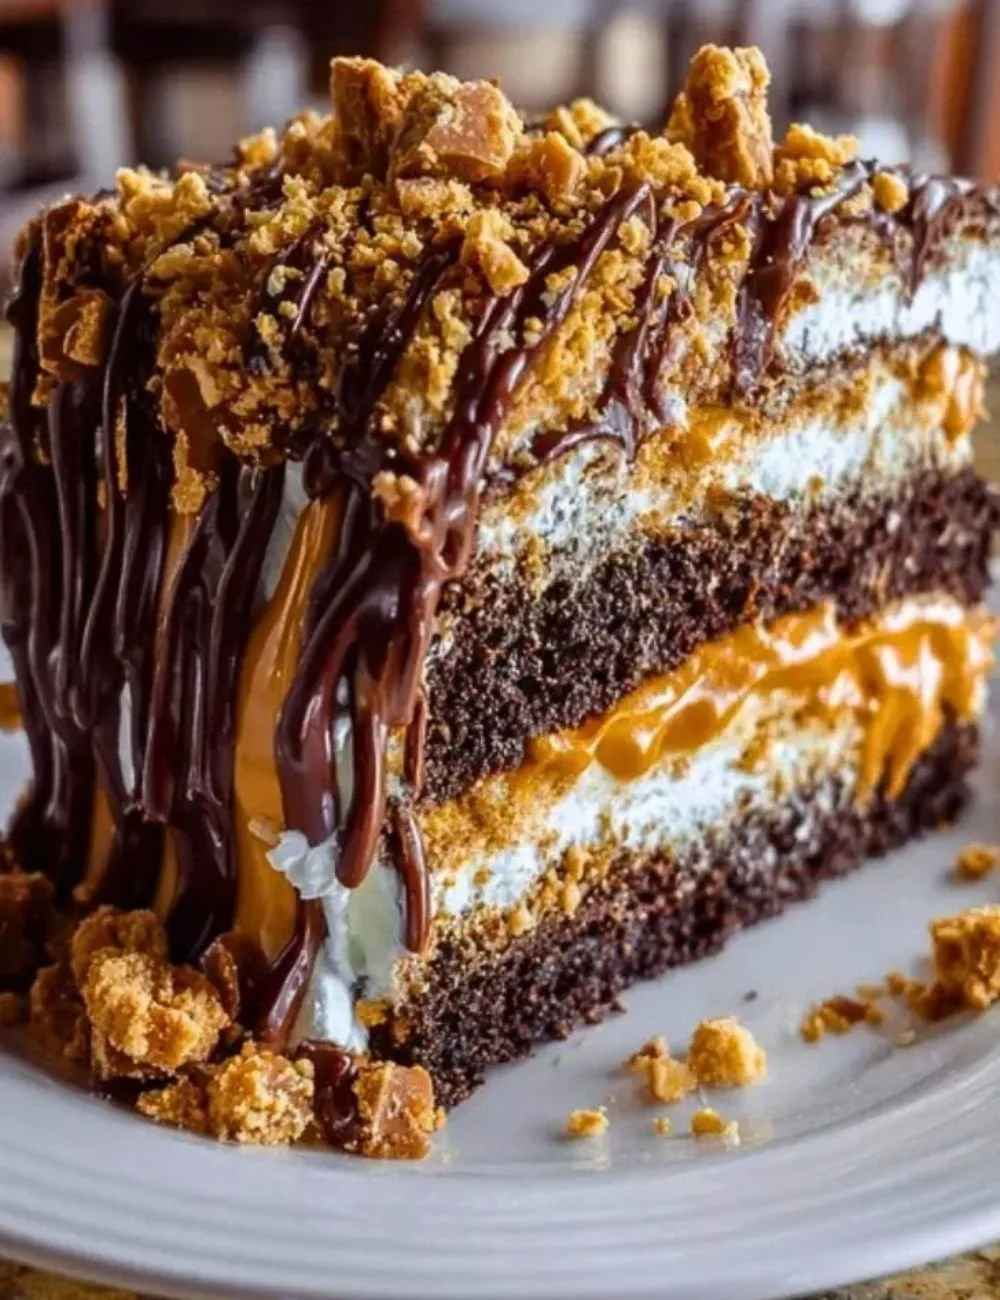
This Butterfinger Bomb Cake is a show-stopping, no-fuss chocolate layer cake filled with a peanut-buttery center, piled with crunchy Butterfinger pieces and a cloud of whipped topping. It smells like rich chocolate and toasted peanut butter, slices cleanly into generous portions, and offers a satisfying mix of creamy, crunchy, and fudgy textures. If you enjoy bold candy-bar flavors in cake form, this is a simple recipe that delivers big on taste and party appeal — and if you like lighter bundt-style cakes too, try a different twist with this apple bundt cake recipe for another crowd-pleaser.
Recipe Information
- Prep Time: 20 minutes
- Cook Time: 30 minutes
- Total Time: 50 minutes
- Servings: 12
- Difficulty Level: Easy
Nutrition Information
(Approximate per serving — values rounded)
- Calories per serving: 500 kcal
- Protein: 8 g
- Carbohydrates: 55 g
- Fat: 25 g
- Fiber: 2 g
- Sugar: 35 g
- Sodium: 350 mg
Why Make This Butterfinger Bomb Cake
This cake is a fast way to make a decadent dessert that looks and tastes indulgent without complicated techniques. It uses a store-bought chocolate cake mix for a moist base, a simple peanut butter-and-sugar filling for creamy richness, and crushed Butterfinger candy for a crunchy, buttery-candy contrast. The whipped topping keeps the finish light and makes assembly quick. It’s perfect for birthdays, potlucks, or whenever you want a nostalgic candy-bar treat in cake form.
How to Make Butterfinger Bomb Cake
The method is straightforward: bake two chocolate cake layers, mix a quick peanut-butter filling, sandwich the layers, top with whipped topping, and finish with crushed Butterfinger pieces and a chocolate drizzle. No special equipment is needed beyond basic bowls and pans. Chill briefly before serving so flavors meld and slices hold their shape.
Ingredients:
- 1 box chocolate cake mix
- 1 cup water
- 1/2 cup vegetable oil
- 3 large eggs
- 1 cup peanut butter
- 1 cup powdered sugar
- 1 container whipped topping
- 2 cups crushed Butterfinger candy bars
- Chocolate syrup (for drizzling)
Directions:
Step 1: Preparation
Preheat the oven to 350°F (175°C). Grease and flour two 9-inch round cake pans so the layers release cleanly after baking.
Step 2: Mixing
In a large bowl, combine the chocolate cake mix, 1 cup water, 1/2 cup vegetable oil, and 3 large eggs. Mix until smooth and there are no dry streaks. Divide the batter evenly between the prepared pans.
Step 3: Cooking
Bake the layers as directed on the cake mix box, usually around 25–30 minutes. Test by inserting a toothpick into the center — it should come out clean or with a few moist crumbs. Remove pans and let layers cool in the pans for 10 minutes, then turn out onto a rack to cool completely. While the cakes cool, prepare the filling by mixing 1 cup peanut butter with 1 cup powdered sugar until well combined and smooth.
Step 4: Finishing
Once the cakes are completely cooled, place one layer on a serving plate. Spread the peanut butter mixture evenly over the top, then sprinkle with half of the crushed Butterfinger bars. Place the second cake layer on top and cover with the whipped topping, smoothing with a spatula. Sprinkle the remaining crushed Butterfinger bars on top and drizzle with chocolate syrup. Refrigerate for at least 30 minutes before slicing so the filling sets. Enjoy!
How to Serve Butterfinger Bomb Cake
- Serve chilled or slightly cool — cold is best to keep the whipped topping stable and the peanut butter filling firm.
- Slice with a sharp knife wiped between cuts for clean edges.
- Add a scoop of vanilla ice cream or a drizzle of hot fudge for extra indulgence.
- This cake is great for parties; cut into smaller wedges for a dessert buffet.
How to Store Butterfinger Bomb Cake
- Room temperature: Not recommended for more than 2 hours because of the whipped topping and peanut butter filling.
- Refrigerator: Store in an airtight cake carrier or cover with plastic wrap for up to 4 days. The cake firms up and flavors meld, but the topping may weep slightly; give it a quick pat before serving.
- Freezing: You can freeze unfrosted baked layers wrapped tightly in plastic and foil for up to 2 months. Thaw in the refrigerator overnight, then assemble. Do not freeze after adding whipped topping.
Expert Tips for Perfect Butterfinger Bomb Cake
- Cool completely: Make sure the cake layers are fully cooled before adding the peanut butter filling or whipped topping to avoid melting or sliding layers.
- Texture balance: Crush Butterfinger pieces to a mix of small bits and crumbs — larger pieces add crunch while crumbs stick better to the whipped topping.
- Smooth filling: Beat the peanut butter and powdered sugar well to remove lumps; if it’s too stiff, add 1 teaspoon of milk at a time until spreadable.
- Prevent sogginess: If you worry about the peanut butter seeping into the cake, spread a thin layer of whipped topping first or chill the cake layers briefly before assembling.
- Serving tip: Let the refrigerated cake sit at room temperature 10–15 minutes before serving for softer slices and more pronounced peanut-butter flavor.
Delicious Variations
- Peanut Butter Cup Version: Fold chopped peanut butter cups into the filling and use crushed peanut butter cups instead of Butterfinger.
- Salted Caramel Twist: Drizzle salted caramel over the top with the chocolate syrup and sprinkle flaky sea salt for a sweet-salty finish.
- Nut-Free Option: Replace peanut butter with a sunbutter or cookie-butter spread and ensure candy pieces are safe for nut-free diets.
- Coffee-Chocolate: Add 1–2 teaspoons of instant espresso powder to the cake batter for a mocha depth that pairs well with Butterfinger crunch.
- Mini Cakelets: Bake in a 9×13 pan or use cupcake tins for single-serve versions; adjust baking time accordingly.
Frequently Asked Questions
Q: Can I use homemade chocolate cake instead of a box mix?
A: Yes. Use your favorite chocolate cake recipe and bake two 9-inch layers. Baking time will vary by recipe, so follow those directions and cool layers completely before assembling.
Q: How do I prevent the whipped topping from weeping?
A: Keep the cake chilled until just before serving and use a stabilized whipped topping if you need it to hold longer (stabilized with a bit of gelatin or powdered sugar). Avoid storing at warm room temperatures.
Q: Can I make the peanut butter filling ahead of time?
A: Yes. You can make the peanut butter filling and store it in an airtight container in the refrigerator for up to 3 days. Bring it to room temperature and lightly stir before spreading.
Q: My Butterfinger pieces sunk into the topping. How can I keep them on top?
A: Sprinkle some crushed Butterfinger on top just before serving to keep them crunchy. Alternatively, press larger pieces gently into the whipped topping and refrigerate to help them adhere.
Q: Is there an alternative to crushed Butterfinger candy?
A: Yes — chopped Snickers, Heath bars, or Skor bars work well. For a non-candy option try crushed toasted peanuts mixed with toffee bits.
Q: Can I make this cake gluten-free?
A: Use a gluten-free chocolate cake mix and confirm that all other ingredients (like the whipped topping and candy) are labeled gluten-free. Some candy bars may contain wheat or be made on shared equipment.
Conclusion
This Butterfinger Bomb Cake is a simple, crowd-pleasing dessert that combines chocolate cake, creamy peanut butter, crunchy candy, and cool whipped topping into one delightful slice — perfect for celebrations or an indulgent weekend treat. For another inspiration that makes entertaining easy, check out this butterfinger bomb cake | Just A Pinch Recipes. Enjoy baking, and don’t be afraid to make this recipe your own with the variations and tips above — you’ll love the crunchy, peanut-buttery finish.
Print
Butterfinger Bomb Cake
- Total Time: 50 minutes
- Yield: 12 servings 1x
- Diet: Vegetarian
Description
A show-stopping chocolate layer cake filled with a creamy peanut-buttery center and topped with whipped cream and crunchy Butterfinger pieces.
Ingredients
- 1 box chocolate cake mix
- 1 cup water
- 1/2 cup vegetable oil
- 3 large eggs
- 1 cup peanut butter
- 1 cup powdered sugar
- 1 container whipped topping
- 2 cups crushed Butterfinger candy bars
- Chocolate syrup (for drizzling)
Instructions
- Preheat the oven to 350°F (175°C). Grease and flour two 9-inch round cake pans.
- In a large bowl, combine the chocolate cake mix, water, vegetable oil, and eggs. Mix until smooth.
- Divide the batter evenly between the prepared pans and bake as directed on the box, usually 25–30 minutes. Cool in pans for 10 minutes, then turn out onto a rack to cool completely.
- While cakes cool, mix together the peanut butter and powdered sugar until smooth.
- Once cooled, place one cake layer on a serving plate, spread peanut butter mixture on top, and sprinkle with half of the crushed Butterfinger bars. Top with the second cake layer.
- Cover with whipped topping, sprinkle with remaining Butterfinger bars, and drizzle with chocolate syrup. Refrigerate for at least 30 minutes before slicing.
Notes
Serve chilled for best texture. Add ice cream or hot fudge for a special treat.
- Prep Time: 20 minutes
- Cook Time: 30 minutes
- Category: Dessert
- Method: Baking
- Cuisine: American
Nutrition
- Serving Size: 1 serving
- Calories: 500
- Sugar: 35g
- Sodium: 350mg
- Fat: 25g
- Saturated Fat: 8g
- Unsaturated Fat: 15g
- Trans Fat: 0g
- Carbohydrates: 55g
- Fiber: 2g
- Protein: 8g
- Cholesterol: 60mg