
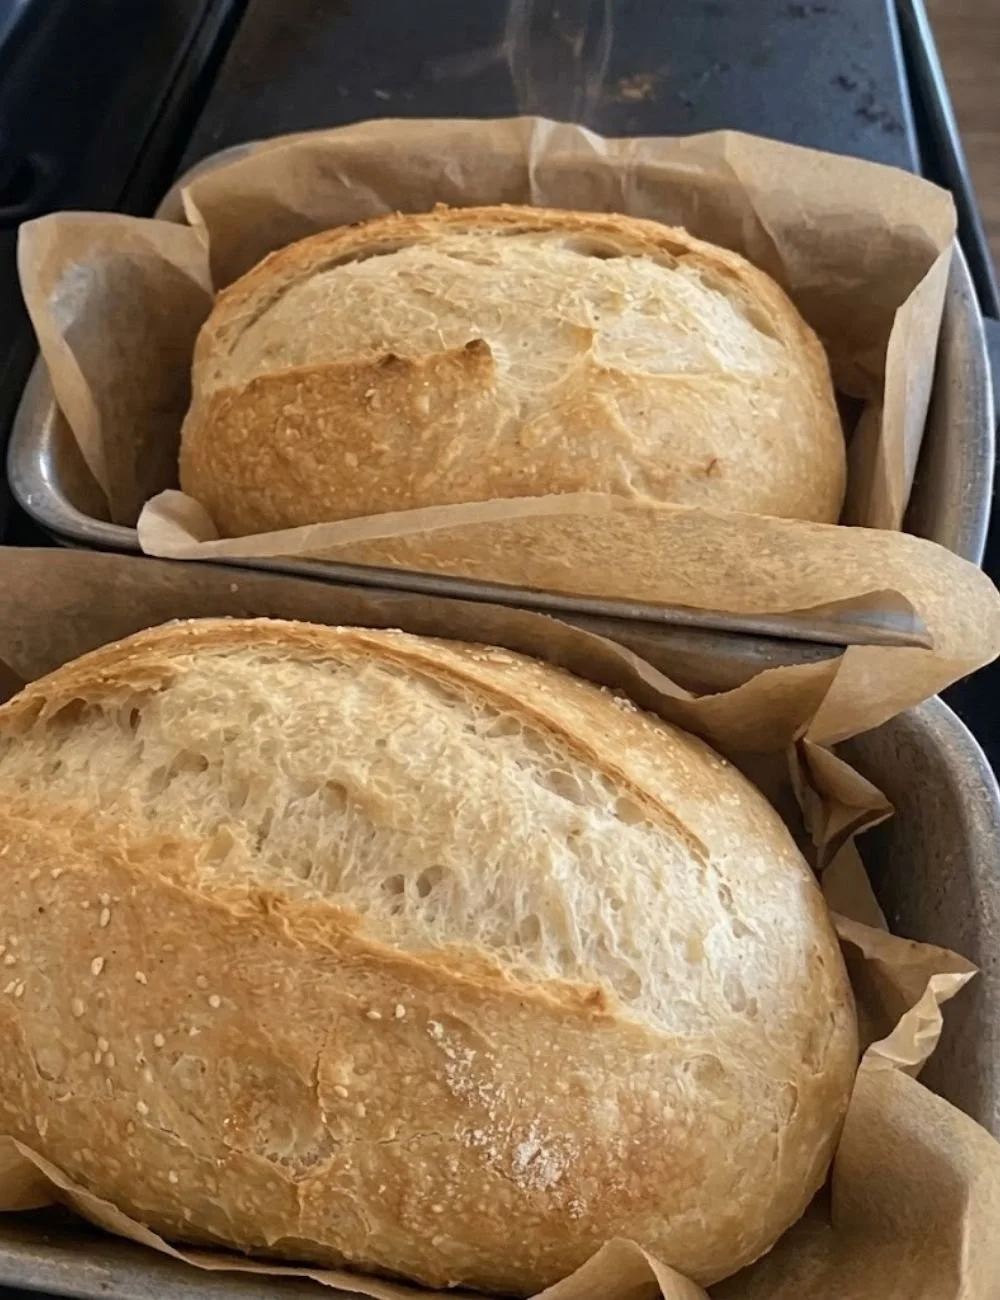
This homemade no-knead sandwich bread is a simple, hands-off loaf that gives you a soft, tender crumb and a thin, golden crust. It smells warm and yeasty as it bakes and slices into even pieces that hold sandwiches well. If you like experimenting with shapes and flavors, try a similar twist with the no-knead dill gouda artisan bread for an herby, cheesy version.
Recipe Information
- Prep Time: 15 minutes active + 12–18 hours resting
- Cook Time: 45–50 minutes
- Total Time: 13–19 hours (including resting and baking)
- Servings: 12 slices
- Difficulty Level: Easy
Nutrition Information
- Calories per serving: 110 kcal (approx.)
- Protein: 3 g
- Carbohydrates: 23 g
- Fat: 0.5 g
- Fiber: 0.8 g
- Sugar: 0.1 g
- Sodium: 190 mg
Why Make This Homemade No-Knead Sandwich Bread
This loaf is perfect when you want fresh bread without long active work. The long, slow rest lets the flour hydrate and the gluten relax. The result is a soft interior with small, even holes that make great sandwich slices. It needs little attention, yet it fills your kitchen with a comforting, warm aroma. Use it for breakfast toast, hearty sandwiches, or as a simple table bread.
How to Make Homemade No-Knead Sandwich Bread
This recipe relies on time rather than elbow grease. You mix a shaggy dough, let it rise slowly, shape it gently, and bake it inside a hot Dutch oven for a crisp, golden crust and soft crumb. Below are clear steps and tips so your loaf comes out well the first time.
Ingredients:
- 3 cups all-purpose flour
- 1/4 teaspoon instant yeast
- 1 teaspoon salt
- 1 1/2 cups water
Directions:
Step 1: Preparation
In a large bowl, combine the flour, yeast, and salt. Pour in the water and stir with a wooden spoon or spatula until a rough, shaggy dough forms. It will look sticky and uneven. Cover the bowl tightly with plastic wrap and leave it on the counter at room temperature for 12–18 hours. The dough should rise, develop bubbles, and look airy.
Step 2: Mixing
After the long rest, flour a clean work surface lightly and turn the dough out onto it. Use a bench scraper or your hands to fold the dough over itself a few times to shape it. Form it into a loose ball by tucking edges underneath. Let it rest uncovered for 15 minutes so the gluten relaxes and the dough holds shape better.
Step 3: Cooking
Meanwhile, place a 5-6 quart Dutch oven (or similar heavy lidded pot) into the oven and preheat to 450°F (230°C). After the 15-minute rest, shape the dough again into a smooth ball and transfer it into a bowl lined with parchment paper. Carefully remove the hot Dutch oven from the oven, lift the dough by the parchment, and lower it into the pot. Cover with the lid and bake for 30 minutes.
Step 4: Finishing
Remove the lid and bake for another 15–20 minutes, or until the crust is deep golden brown. The loaf should sound hollow when tapped. Use oven mitts and a long spatula or tongs to lift the bread out onto a wire rack. Let it cool completely before slicing so the crumb sets and slices cleanly.
How to Serve Homemade No-Knead Sandwich Bread
Slice thin or thick for sandwiches, toast, or dipping. It’s excellent with butter and jam, grilled cheese, deli meats, or avocado. For gatherings, serve warm slices with a board of cheeses and spreads. The crumb soaks up dressings and melted cheese without falling apart.
How to Store Homemade No-Knead Sandwich Bread
- At room temperature: Keep whole or sliced in a bread box or airtight container for up to 3 days.
- In the fridge: Avoid refrigeration; it dries bread faster.
- In the freezer: Wrap slices tightly in plastic and foil, or place in a freezer bag for up to 3 months. Toast or thaw slices straight from the freezer.
Expert Tips for Perfect Homemade No-Knead Sandwich Bread
- Measure flour by weight for best results (3 cups ≈ 360 g). Packing cups changes texture.
- Use a kitchen scale if you can. It makes the dough more consistent.
- Water temperature: room temperature is fine. No need to heat water for this slow-ferment recipe.
- If the dough seems too wet to handle, dust your hands and surface lightly with flour—avoid adding much more flour.
- A hot Dutch oven creates steam and gives a thin, crisp crust. Preheating the pot is key.
- Let the loaf cool fully before slicing. Cutting hot bread makes it gummy.
- Substitute up to half the flour with whole wheat for a nuttier flavor. Add a tablespoon more water if you do.
- For a richer crust, brush the top with melted butter right after baking.
Delicious Variations
- Whole Wheat Mix: Replace 1–1.5 cups of all-purpose flour with whole wheat flour. Expect a denser crumb.
- Seeds and Grains: Fold in 1/3 cup seeds (sunflower, flax, or sesame) for texture and flavor.
- Herb Bread: Add 1–2 tablespoons of chopped fresh herbs (rosemary, thyme) into the dough for aroma.
- Olive or Cheese Fold: Gently press chopped olives or grated cheese into the dough before the final shape.
- Sweet Twist: Add 1–2 tablespoons honey and 1/4 cup raisins for a lightly sweet loaf.
Frequently Asked Questions
Q: Can I shorten the resting time?
A: The long rest develops flavor and structure. Shortening it will give a milder taste and tighter crumb. You can let it rest at least 6 hours, but 12+ hours is best.
Q: Why is my bread dense?
A: Dense bread often means the dough didn’t rise enough or the shaping crushed the air. Make sure the dough bubbled during the rest and be gentle when shaping.
Q: Do I need a Dutch oven?
A: A Dutch oven is ideal for steam and heat retention. If you don’t have one, use a heavy baking dish with a lid or place a tray of hot water in the oven to create steam. Results may vary.
Q: How do I know when the bread is done?
A: The crust should be deep golden-brown and the loaf should sound hollow when tapped on the bottom. An internal temperature of 200–205°F (93–96°C) indicates doneness.
Q: Can I add sugar or fat to the recipe?
A: Yes. Adding 1–2 tablespoons of sugar or 1–2 tablespoons of oil/butter will change the texture and flavor, giving a softer crumb and slightly sweeter taste. Reduce water slightly if you add fat.
Q: Can I use active dry yeast instead of instant yeast?
A: Yes. Use about 1/2 teaspoon active dry yeast and dissolve it in the water for 5–10 minutes before mixing with the flour.
Q: Why is my crust too thick or too hard?
A: Baking too long or at too high a temperature can over-thicken the crust. Also, letting the loaf sit in a very dry area while cooling can harden the exterior. Brushing with butter after baking softens the crust.
Conclusion
This no-knead sandwich bread gives you an easy path to soft, sandwich-ready slices with minimal hands-on time. It’s forgiving, versatile, and makes the kitchen smell wonderful. For another trusted no-knead take on sandwich loaves, see this classic version at No-Knead Sandwich Bread – Food52. Give it a try — the payoff is a simple, homemade loaf that beats store bread in taste and texture.
Print
Homemade No-Knead Sandwich Bread
- Total Time: 13 hours
- Yield: 12 slices 1x
- Diet: Vegetarian
Description
A simple, hands-off loaf that gives a soft, tender crumb and a thin, golden crust, perfect for sandwiches.
Ingredients
- 3 cups all-purpose flour
- 1/4 teaspoon instant yeast
- 1 teaspoon salt
- 1 1/2 cups water
Instructions
- In a large bowl, combine the flour, yeast, and salt. Pour in the water and stir with a wooden spoon or spatula until a rough, shaggy dough forms. Cover the bowl tightly with plastic wrap and let it rest for 12–18 hours.
- After the long rest, flour a clean work surface lightly and turn the dough out onto it. Fold the dough over itself a few times to shape it into a loose ball. Let it rest uncovered for 15 minutes.
- Meanwhile, place a 5-6 quart Dutch oven into the oven and preheat to 450°F (230°C). After the rest, shape the dough into a smooth ball and transfer it into a bowl lined with parchment paper.
- Carefully remove the hot Dutch oven from the oven, lift the dough by the parchment, and lower it into the pot. Cover with the lid and bake for 30 minutes.
- Remove the lid and bake for another 15–20 minutes, or until the crust is deep golden brown. The loaf should sound hollow when tapped. Let it cool completely before slicing.
Notes
For best results, measure flour by weight. Let the loaf cool fully before slicing to avoid a gummy texture.
- Prep Time: 15 minutes
- Cook Time: 50 minutes
- Category: Bread
- Method: Baking
- Cuisine: American
Nutrition
- Serving Size: 1 slice
- Calories: 110
- Sugar: 0.1g
- Sodium: 190mg
- Fat: 0.5g
- Saturated Fat: 0g
- Unsaturated Fat: 0g
- Trans Fat: 0g
- Carbohydrates: 23g
- Fiber: 0.8g
- Protein: 3g
- Cholesterol: 0mg