

Changing the feeding ratio of my sourdough starter has been a true game-changer for my bread-making journey. This simple adjustment not only enhanced the flavor and texture of my bread but also improved the overall baking experience. The subtle tanginess, airy crumb, and chewy crust that result from the right feeding ratio are nothing short of magical. Here’s how you can replicate this transformation in your own kitchen!
Recipe Information
- Prep Time: 20 minutes
- Cook Time: 45 minutes
- Total Time: 1 hour 5 minutes
- Servings: 1 large loaf
- Difficulty Level: Medium
Nutrition Information
- Calories per serving: 250
- Protein: 8 grams
- Carbohydrates: 46 grams
- Fat: 2 grams
- Fiber: 2 grams
- Sugar: 1 gram
- Sodium: 480 mg
Why Make This How Changing My Sourdough Starter Feeding Ratio Transformed My Bread
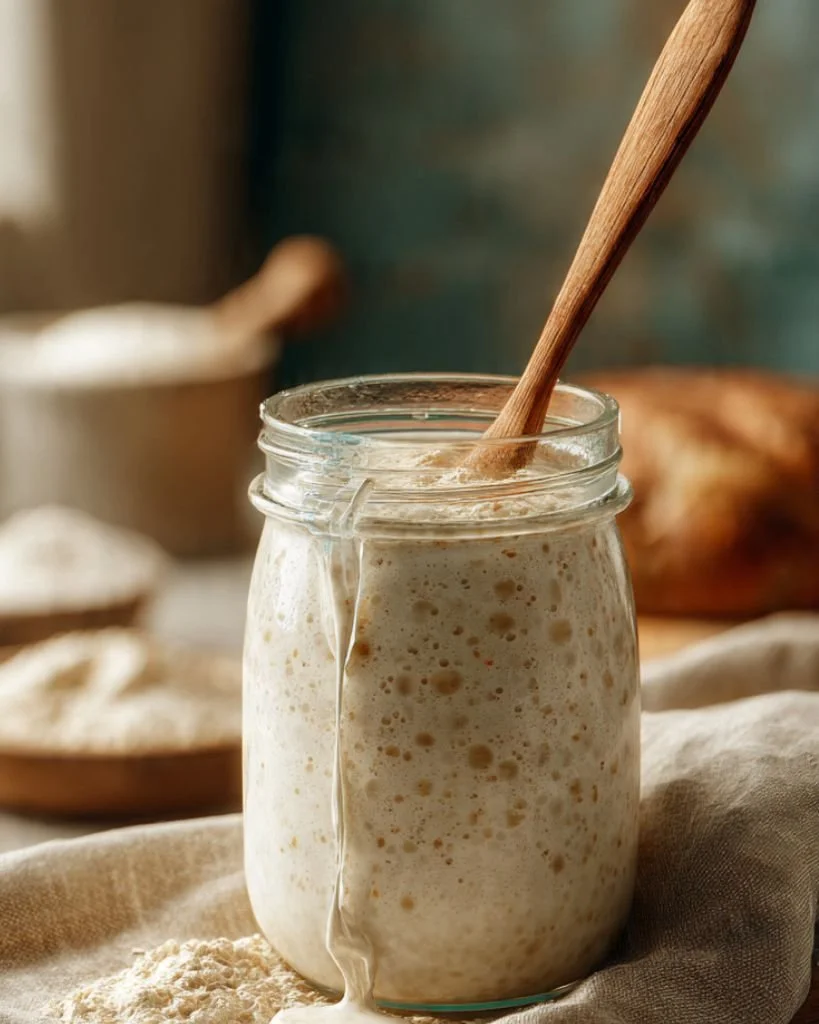
Adjusting the feeding ratio of your sourdough starter can make a significant difference in the flavor and texture of your bread. A higher ratio of flour to water creates a thicker, more robust starter that can produce a bread with a deeper flavor and better structure. By experimenting with this ratio, I discovered how to enhance the tanginess and complexity of my bread, resulting in a loaf that’s not only pleasing to the palate but also visually appealing. It’s an easy tweak that any home baker can try!
How to Make How Changing My Sourdough Starter Feeding Ratio Transformed My Bread
Ingredients:
- 1 cup (120g) active sourdough starter
- 1 ½ cups (190g) all-purpose flour
- 1 cup (240ml) water, lukewarm
- 1 teaspoon salt
Directions:
-
Step 1: Preparation
Begin by gathering all your ingredients. Ensure your sourdough starter is active and bubbly. You can achieve this by feeding it a few hours before you begin baking.
-
Step 2: Mixing
In a large bowl, mix together the flour and salt. In a separate bowl, combine the active sourdough starter with lukewarm water. Stir until well blended, then pour the starter mixture into the flour mixture.
-
Step 3: Kneading
Mix the dough with your hands until it starts to come together. Then, knead it on a floured surface for about 10 minutes until it’s smooth and elastic.
-
Step 4: First Rise
Place the kneaded dough in a lightly oiled bowl, cover it with a damp cloth, and let it rise in a warm spot for 4-6 hours or until it has doubled in size.
-
Step 5: Shaping
Once risen, gently deflate the dough and turn it out onto a clean surface. Shape it into a loaf by folding and tucking in the sides.
-
Step 6: Second Rise
Place the shaped loaf into a greased loaf pan, cover it with a cloth, and let it rise for another hour until puffed up.
-
Step 7: Baking
Preheat your oven to 425°F (220°C). Once the oven is hot, bake the loaf for 40-45 minutes, or until the top is golden brown and the bread sounds hollow when tapped.
-
Step 8: Cooling
After baking, remove the bread from the oven and let it cool in the pan for 10 minutes. Then transfer it to a wire rack to cool completely.
How to Serve How Changing My Sourdough Starter Feeding Ratio Transformed My Bread
Serve your sourdough bread sliced warm from the oven, slathered with butter or drizzled with olive oil. It pairs wonderfully with soups, salads, or as a base for sandwiches. To elevate your serving experience, consider toasting the slices for added texture and flavor.
How to Store How Changing My Sourdough Starter Feeding Ratio Transformed My Bread
Store leftover bread in a paper bag at room temperature for up to 3 days. If you want to keep it longer, wrap it in plastic wrap and freeze it for up to 3 months. Thaw at room temperature before slicing.
Expert Tips for Perfect How Changing My Sourdough Starter Feeding Ratio Transformed My Bread
- Use a kitchen scale: Measuring your ingredients by weight provides consistency and better results in your bread.
- Check your starter: Ensure your starter is bubbly and at peak activity for the best rise.
- Experiment with hydration: Adjust the water in relation to the flour for different textures.
- Maintain a warm environment: Sourdough loves warmth; consider using your oven’s light or a proofing box to encourage rising.
- Don’t rush the process: Patience is key with sourdough; allow ample time for both rises to develop flavor.
Delicious Variations
- Add herbs and cheese: Mix in fresh herbs like rosemary or thyme and grated cheese for a savory twist.
- Sweeten it up: Add honey or dried fruits like cranberries and nuts for a slightly sweet loaf.
- Multigrain: Mix in different types of flour, such as whole wheat and rye, for added flavor and texture.
- Spices: Incorporate spices like cinnamon or cardamom for an aromatic bread perfect for breakfast.
Frequently Asked Questions
-
What is a sourdough starter?
A sourdough starter is a mixture of flour and water that houses wild yeast and bacteria, creating a leavening agent for bread. -
Can I use all-purpose flour instead of bread flour?
Yes, you can use all-purpose flour, but bread flour provides better structure due to its higher protein content. -
What temperature should the water be for mixing?
Lukewarm water, around 100°F (38°C), helps activate the yeast without killing it. -
How do I know if my dough has been kneaded enough?
The dough should be smooth, elastic, and not overly sticky. A simple windowpane test can check elasticity. -
Why is my sourdough bread dense?
A dense loaf can result from underproofing, using a weak starter, or not kneading the dough sufficiently.
Conclusion
Changing the feeding ratio of my sourdough starter had a profound impact on my bread-making process. The results are not only satisfying but also incredibly delicious. I encourage you to try this technique at home; with a little patience and some experimentation, you can achieve bakery-quality sourdough that will impress family and friends. Happy baking!
PrintSourdough Bread
- Total Time: 65 minutes
- Yield: 1 large loaf 1x
- Diet: Vegetarian
Description
A simple tweak to the feeding ratio of your sourdough starter can transform your bread, enhancing its flavor and texture.
Ingredients
- 1 cup (120g) active sourdough starter
- 1 ½ cups (190g) all-purpose flour
- 1 cup (240ml) water, lukewarm
- 1 teaspoon salt
Instructions
- Begin by gathering all your ingredients. Ensure your sourdough starter is active and bubbly. You can achieve this by feeding it a few hours before you begin baking.
- In a large bowl, mix together the flour and salt. In a separate bowl, combine the active sourdough starter with lukewarm water. Stir until well blended, then pour the starter mixture into the flour mixture.
- Mix the dough with your hands until it starts to come together. Then, knead it on a floured surface for about 10 minutes until it’s smooth and elastic.
- Place the kneaded dough in a lightly oiled bowl, cover it with a damp cloth, and let it rise in a warm spot for 4-6 hours or until it has doubled in size.
- Once risen, gently deflate the dough and turn it out onto a clean surface. Shape it into a loaf by folding and tucking in the sides.
- Place the shaped loaf into a greased loaf pan, cover it with a cloth, and let it rise for another hour until puffed up.
- Preheat your oven to 425°F (220°C). Once the oven is hot, bake the loaf for 40-45 minutes, or until the top is golden brown and the bread sounds hollow when tapped.
- After baking, remove the bread from the oven and let it cool in the pan for 10 minutes. Then transfer it to a wire rack to cool completely.
Notes
Serve with butter or olive oil. Store in a paper bag at room temperature for up to 3 days or wrap in plastic wrap and freeze for up to 3 months.
- Prep Time: 20 minutes
- Cook Time: 45 minutes
- Category: Bread
- Method: Baking
- Cuisine: Italian
Nutrition
- Serving Size: 1 serving
- Calories: 250
- Sugar: 1g
- Sodium: 480mg
- Fat: 2g
- Saturated Fat: 0g
- Unsaturated Fat: 1g
- Trans Fat: 0g
- Carbohydrates: 46g
- Fiber: 2g
- Protein: 8g
- Cholesterol: 0mg